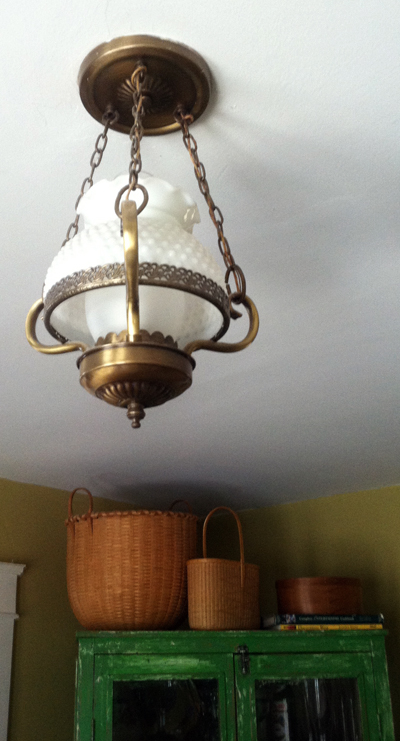
We had the same problem: the dreaded ugly light fixture that came with the old house you bought but you don’t have it in the budget to replace it.
So I needed to come up with a creative solution and a quick fix. As you can see, this light fixture is so tiny. And it’s up high and oddly close to the ceiling. Who would install such a tiny light fixture that high up? And there was no more wire to pull it down lower as well. Maybe that’s why it was installed at such close proximity to the ceiling — they ran out of wire! So the fixture had to stay stagnant.
And, I need to add, that this tiny little tacky fixture is in our dining room! Yes, the dining room. So I needed the “fix” to be something a little more substantial.
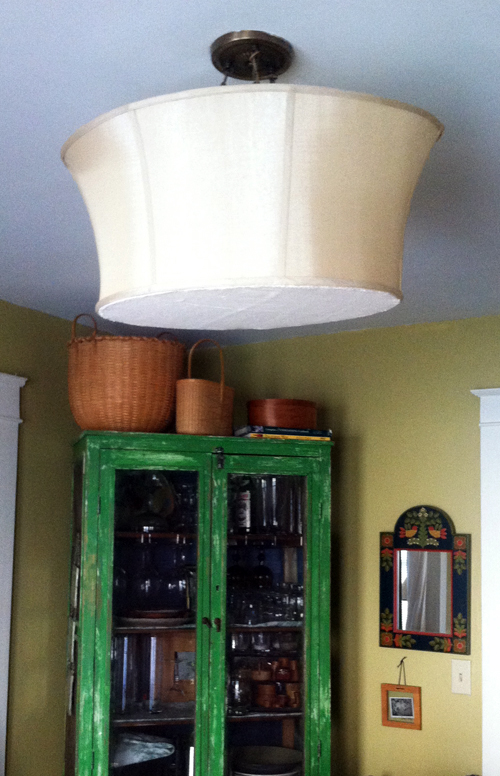
While out “thrifting,” I found a large, modern lamp shade for $7.00. It was large enough to cover the entire fixture and the swooped shape was subtle and would work well juxtaposed so close to the ceiling.
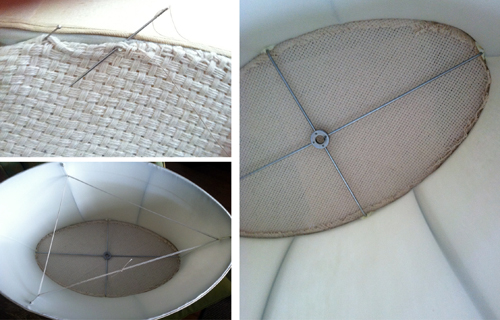
I had some cream colored fabric on hand and it matched perfectly. And I like how it had a “basket weave” design, however, it was a little more difficult to work with. I would choose a more sturdy fabric instead of the delicate one I used here if I had to do it again. (I would’ve also ironed the piece of fabric better so you couldn’t still see the fold! I’m a basketmaker’s wife. Not a domestic goddess. Ironing is not my thing. Neither is cooking and dusting.)
To attach the fabric, I turned the lampshade upside down (the same position it will have when it’s mounted) and pinned the piece of fabric to the inside bottom. Then I stitched it from the outside so I could ensure that my stitches would be nice and even — this is the side that will be illuminated and if it’s all crooked, it will show!
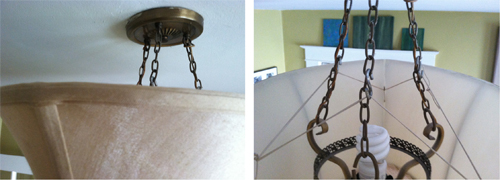
I then rigged up an advanced system to attach it to the existing light fixture — as you can see, my technologically advanced system was simply string and large safety pins. Initially, I intended the pins to be temporary so I could find the correct spot where the shade balanced properly on the old fixture base. But my “temporary” system is still in place. I’ll eventually get to stitching some more permanent hooks. Probably when one of the pins gives way and the shade falls onto the dining room table, I will find the time.
I removed both of the glass hurricane covers from the old fixture so the bulb was exposed and then inserted 3 “s” hook onto each of the existing chains that was holding the lamp. I slipped the lampshade onto the old fixture and inserted each side of string onto the “s” hooks. And that was it! My only cost was the thrift store shade and about an hour of time. (I probably should have spent some extra time dusting the old fixture. Or photoshopping the dust out of my images.)
It’s not going to win any design awards but it is a huge improvement from what we initially had! That tiny fixture was so noticeable and an eyesore. Now, with the new “lampshade fixture” nobody notices the light at all. Exactly what I wanted!


Very ingenious! Fits your style more than the old one.